
Fortune Teller's Tent 2.0 Build Blog
Jump to latest
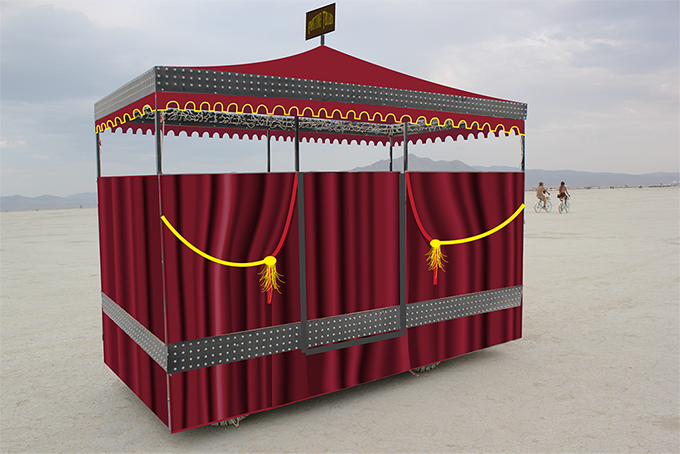
Some background: the Mutant Vehicle I built for 2015 was the Fortune Teller's tent. At the beginning of the project I had
a vision for what it would look like, which I had some difficulty rendering as a drawing due to my meager Photoshop and
Illustrator skills. Still, I was able to bang out this drawing and I think I pretty much delivered what I said I would:
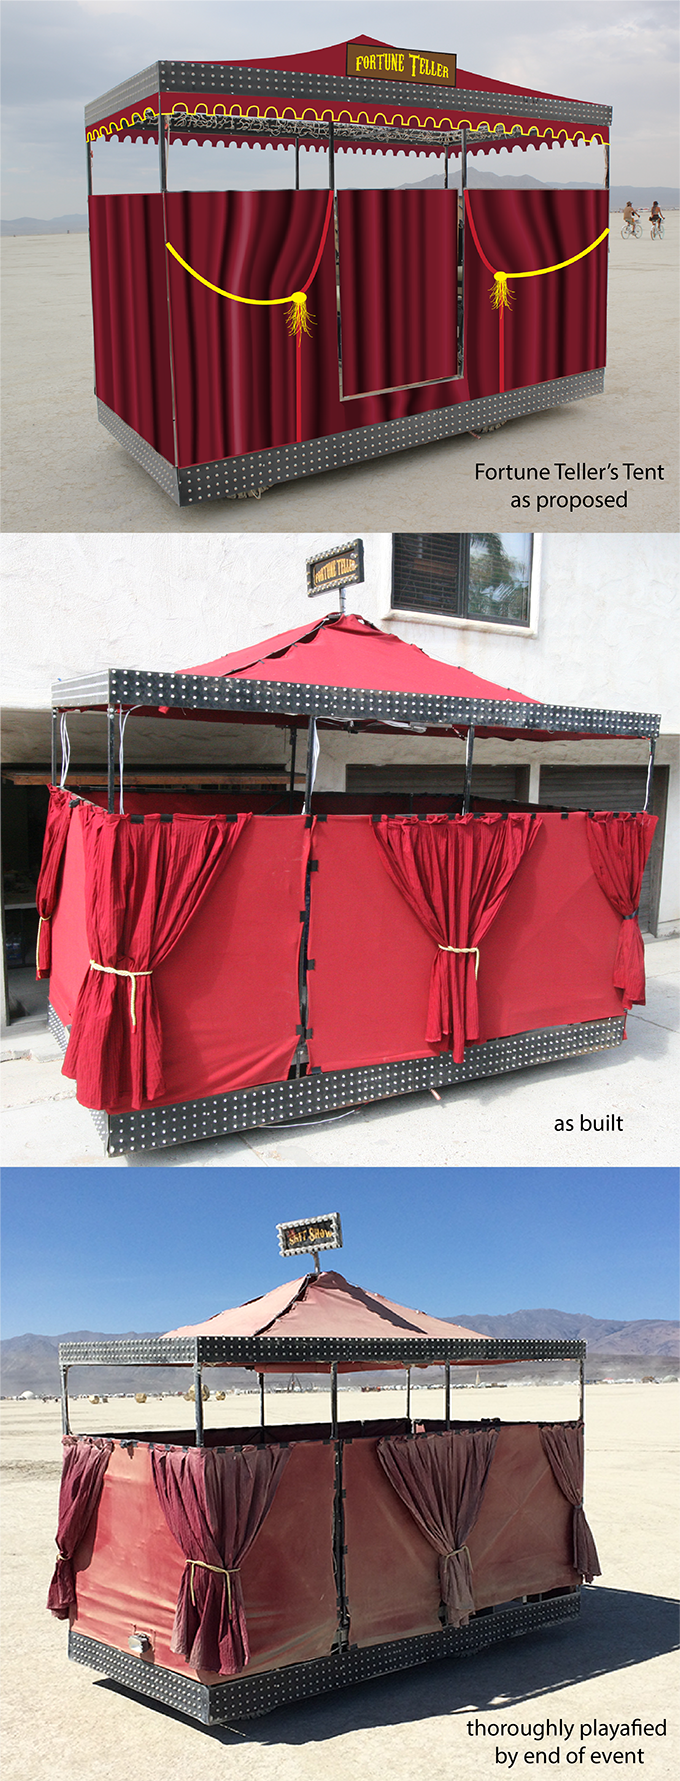
You can read tons more about that project here.
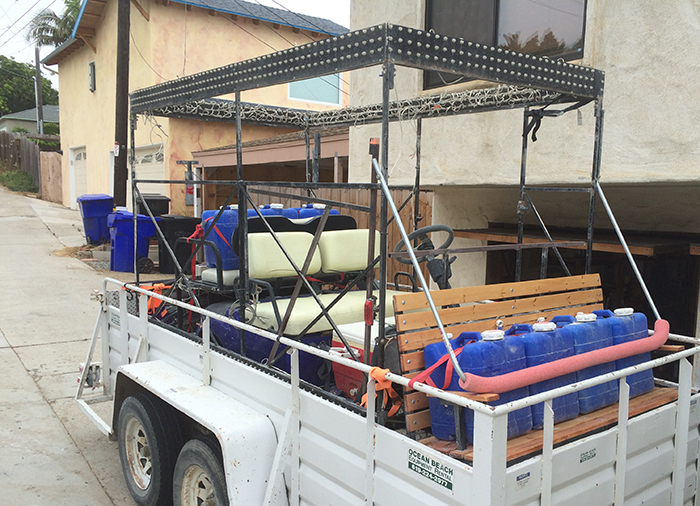
OK, so for 2016 I want to continue to refine this mutant vehicle. Many of the changes are internal. The base vehicle is a 2006 Yamaha golf cart chassis, which has turned out to be a super reliable MV base. Onto the frame of that chassis is bolted some aluminum extrusions, and onto that a wooden subframe, to which the outer metal skeleton frame is bolted. That whole subframe assembly was built before I learned how to weld, and among other issues, the Mutant Vehicle is too big for the trailer on which it's transported, requiring complete disassembly to transport to the playa.
So my plan is to weld from scratch a new interior subframe, which in addition to being stronger and lighter, will reduce the width of the mutant vehicle by about 9 inches, allowing it to be transported to the playa partially assembled.
Another issue with the mutant vehicle is the lower skirt with its psychedelic lighting is attached to a rigid steel grid. It's awesome that the wheels are hidden. What's not so awesome is that while the MV has enough clearance for putt-putting around the playa, it would bottom out cresting the ramp of the trailer, if the cart was narrow enough to even fit on the trailer. So, as part of the frame rebuilt, my plan is to raise the lower lighting panels about 18 inches, and then add a fabric skirt down below. The bottom hem of the skirt will have a large hem into which a metal bar is placed. This will keep the skirt down and the wheels will be as hidden as they were previously.
At this point I inflict upon you my mad photoshop skillz and hopefully demonstrate what I have in mind for that:
So, one of the really funny things that happened last year was we encountered what can only be described as pixel people roaming the playa, and they happened to be blinking a similar random pattern as one of the ones I'd programmed for the lighting system. We actually managed to cram everyone inside. Crappy photo, sorry:
The most logical place to add additional seating is in front of the driver. There's not much frame behind the rear wheels, but up front under where the cowling ordinarily would be, the frame is beefy where the front suspension attaches. So my goal would be to figure out if there's a way to weld up a steel frame that attaches to the beefy part of the golf cart frame. I am not 100% certain about this yet, there's really no way to know until I get some tube steel and fire up the MIG welder.
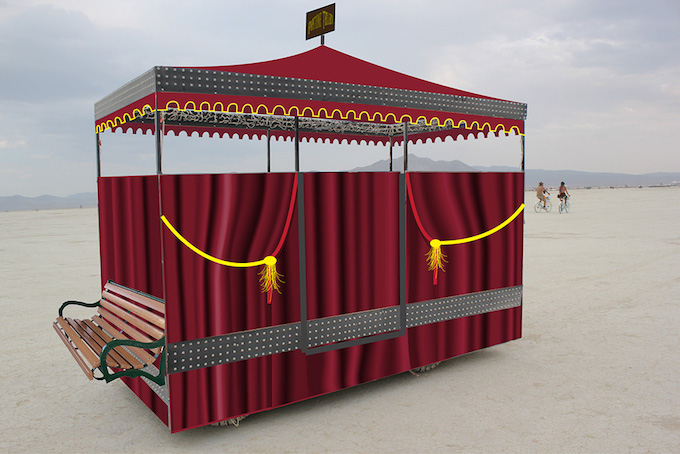
Yes, I know this drawing looks ridiculous. I present this for conceptual purposes.
Safety is my primary concern. The front row of seating would need to be super secure, and I would need to alter the front sight lines by lowering the front part of the tent material. I think it's going to be possible to do that while still conveying "Fortune Teller's Tent" visually, and also while still concealing the base vehicle.
June 2, 2016: Approval!
I received notification from Burning Man Department of Mutant Vehicles that my silly art car was approved. Time to get cracking then!
June 17, 2016: New Subframe
Ok well it's time to stop diddling around.
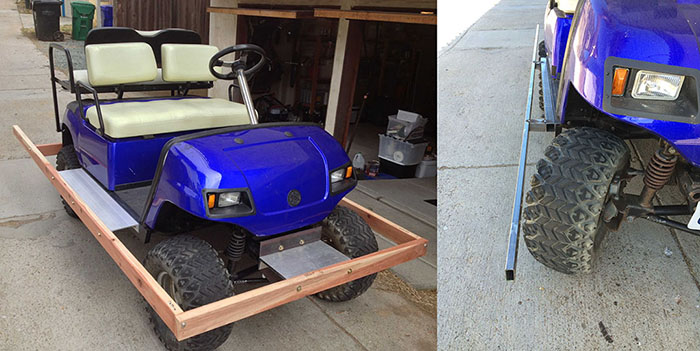
So, the very first thing I need to address is the subframe. The first Mutant Vehicle built on this chassis was the Cargo Crate, and at the time I began that project I hadn't started welding yet. So I wasn't really sure how to get started, but I had to start somewhere. I went to Industrial Metal Supply and discovered that they have aluminum U-channel in a couple different sizes, so I bought a couple of those and had them cut those to length, and drilled some holes in it, and went to Home Depot and bought some 2x4s and before too long I had a reasonably decent subframe.
And that's nice and all, but the subframe had one major flaw - it made the cart too wide to fit on the utility trailer I rent for it. And that meant the whole damn thing had to be disassembled for transport and reassembled on playa. Having done that twice now, I can tell you that it sucks. Also, and I didn't notice this when I started the project, but the golf cart frame is not rectangular. It's wider at the rear than it is at the front, so the thing ended up being slightly trapezoid shaped. So for this year, the first order of business is to correct all that by welding up a new steel subframe that's narrower, and also has some trapezoid of its own to compensate for the cart's frame geometry.
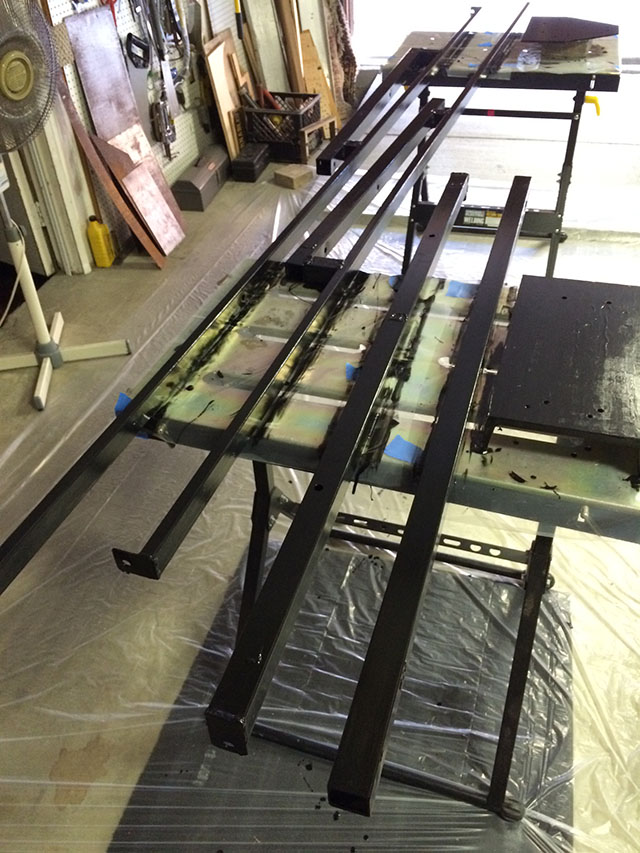
The photo on the left is the old wooden subframe. It was taken right when I built it. Those 2x4 have been stored outdoors and are pretty
weatherbeaten now. The photo on the right shows the new side rail I fabricated today. The front wheels just barely clear the frame when
turned full lock, so I shouldn't lose any turning radius.
Here's a closeup where you can see just how much trapezoid there is in the golf cart frame.
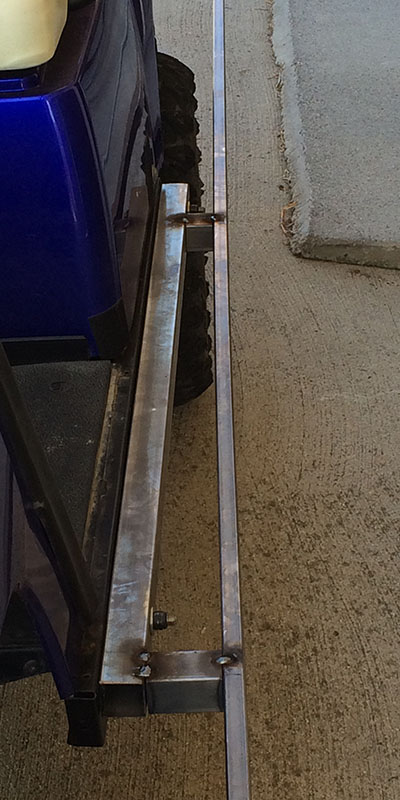
The utility trailer I rent from OB Equpment Rental has a 57" interior width. The old version of the fortune teller's tent was 59" in the front and 84" in the rear (!). The new frame is now 54" wide both front and back. I hope I'm not cutting things too close. Even when secured with ratchet straps, the cart may dance around a little in the trailer. We shall see.
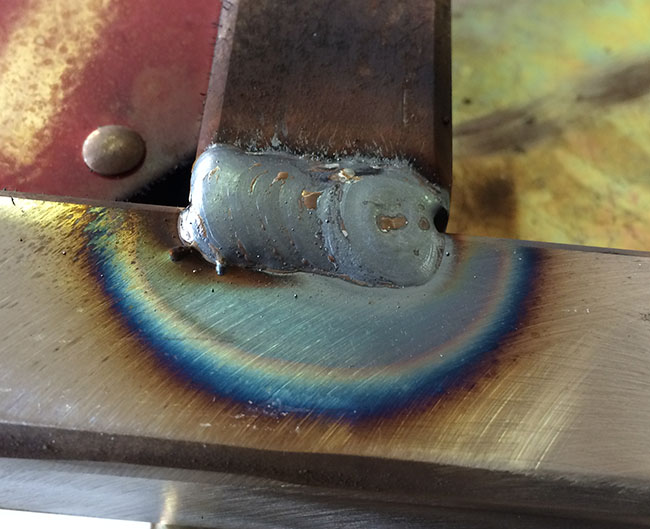
After I took these photos I took the rails off and and welded them fully since there's only tack welds on them. However in the course of doing that my welds started looking really shitty. Took me a while to figure out that the MIG welder had run out of gas. So I guess I'm done for the day.
The next big thing is to figure out the new front seat.
June 18, 2016: did a little more work on the subframe
It's remarkable how much nicer the MIG welder works when there's gas in the bottle. Also planted tomatoes today. Because, tomatoes.
June 19, 2016: subframe is done!
And I'm really happy with how it came out. It's much stiffer and much lighter than the old wooden frame. It's securely bolted to all four sides of the cart frame using recycled Grade 8 bolts from the last incarnation.
Here on the beach naked steel will rust while you watch it,
so I sanded everything down and started painting it. Rattlecan was a PITA last time what with tarps and overspray and working in an enclosed
are, so I'm going to try brush-on Rustoleum this time.
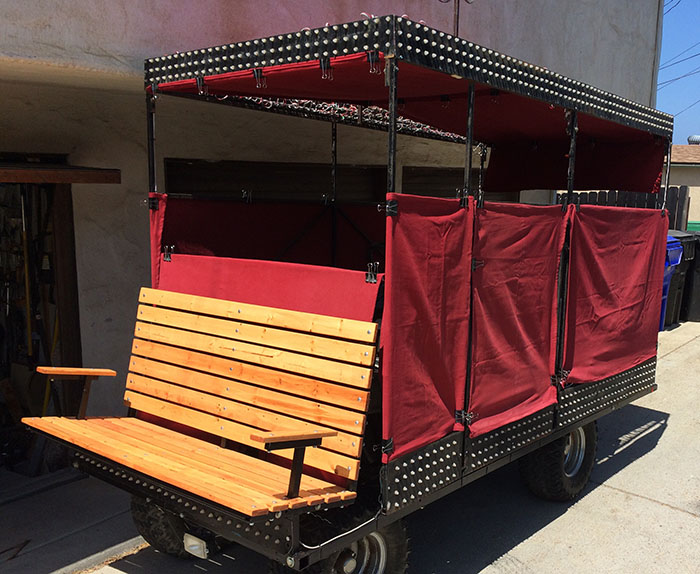
June 22, 2016: Wide seats in our new first class cabin!
Have I mentioned how much nicer the welds are coming out now that there's gas in the bottle?
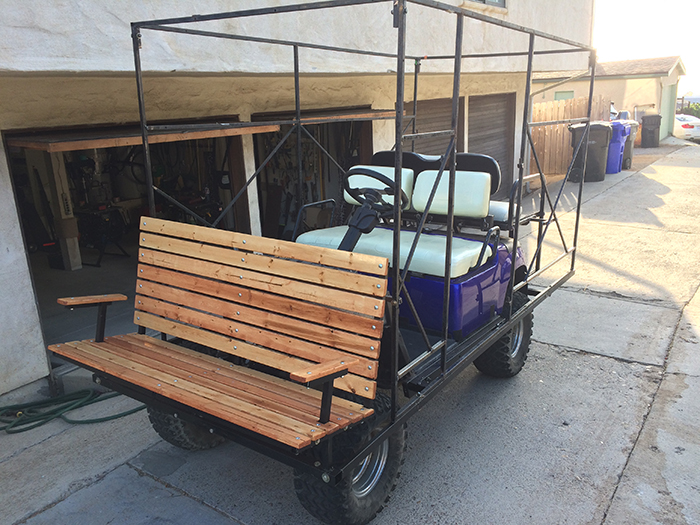
So the next order of business is the new front row of seatng. Turns out that I had a few lengths of super thick, like 10 or 12 ga 1" steel tubing that I got for cheap as scrap. Can't even remember what I bought it for, but whatever it was never got built, so now it gets to be this instead.
People sometimes do jackassy stuff on mutant vehicles, and one of the things I'm concerned about is somebody
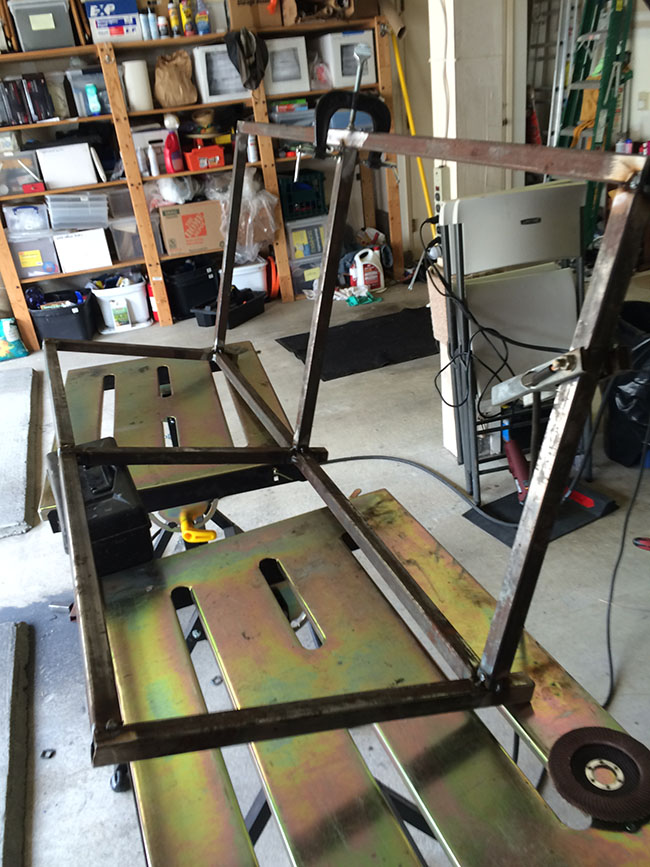
standing up without notice. I'm only going 5mph max, but still.... so my plan is to make the front row seats seriously inclinced
like an Adirondack chair. I figure if the thing is not easy to get out of because their weight is so far rearward, their shoulders
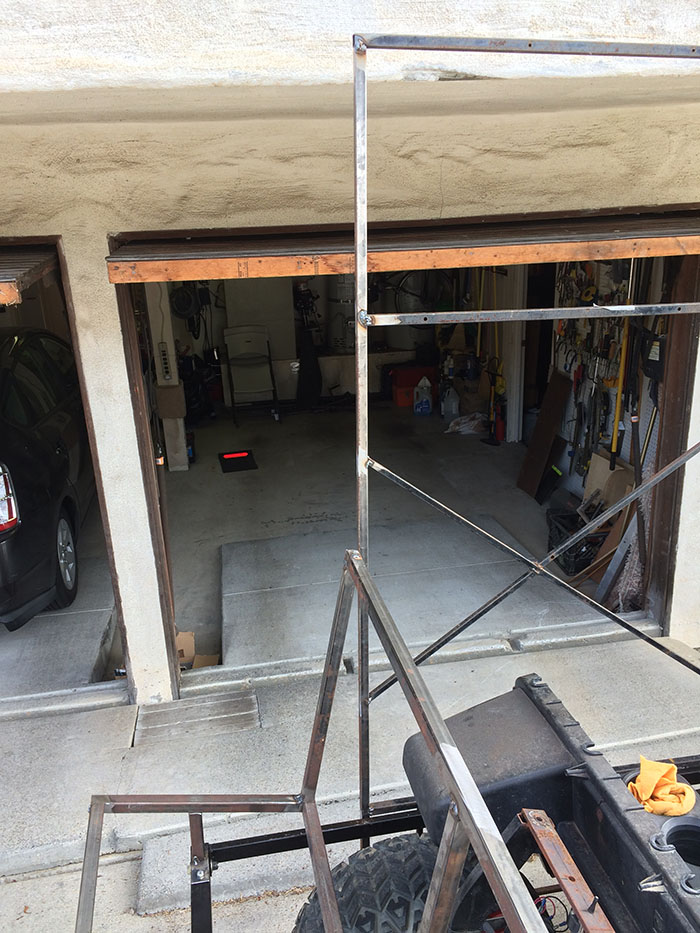
will be a good "tell" if somebody suddenly decides to get up. Anyway, so here's the frame. I'm busy for the next couple days so it won't
be till next week that I figure out how this mounts to the subframe. The actual seating will be wood planks. Probably 2x6s for the bench
part and some sort of shelving for the back rest.
June 28, 2016: more work on the bench
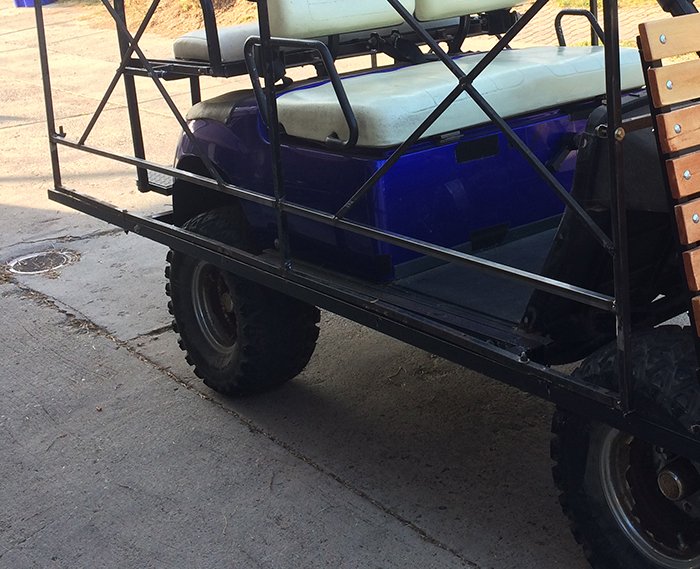
After a busy week and weekend, I'm back to work on the MV. So the first order of business is to figure out how and where the front bench attaches to the cart,
so I got some blocks of wood and tried a few experiments.
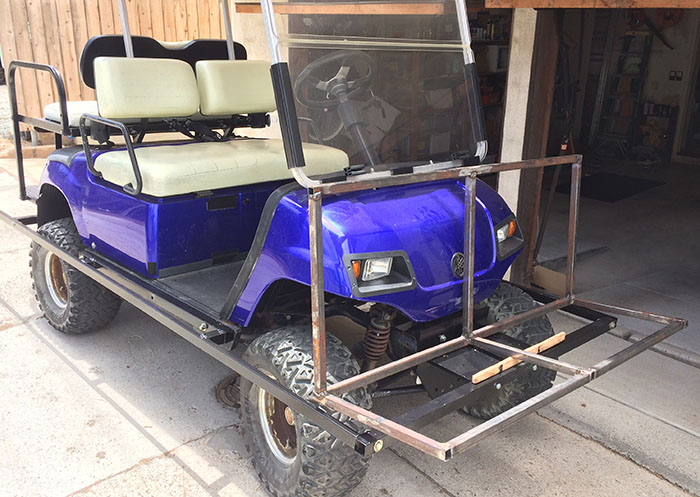
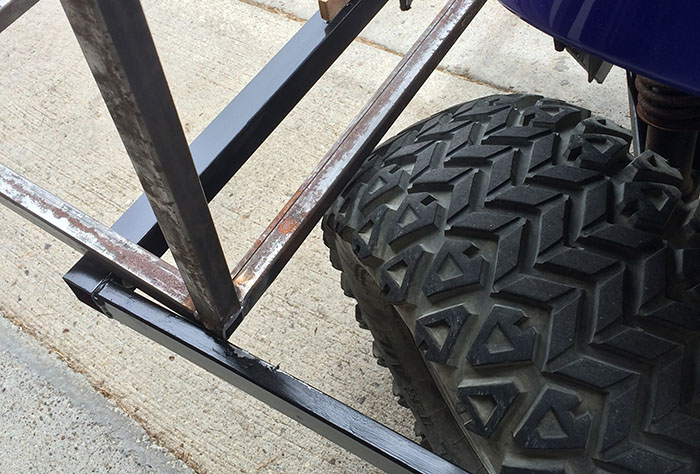
So, right off the bat, this is a problem. The wheel barely clears the back of the bench when turning, and that's with no weight in the front. Also, I want to have the bench further rearward, so it's time to remove the golf cart's front cowling, which also means removing the canopy and windshield. So I guess I'm done cruising around OB in the golf cart till after the burn, because it's now no longer street-legal.
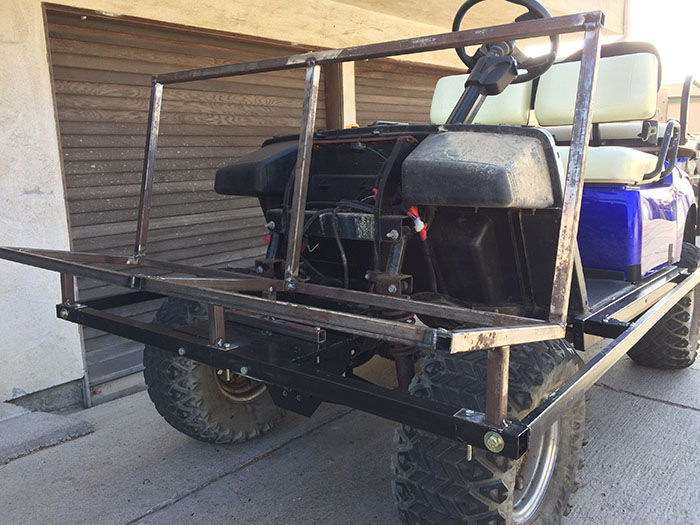
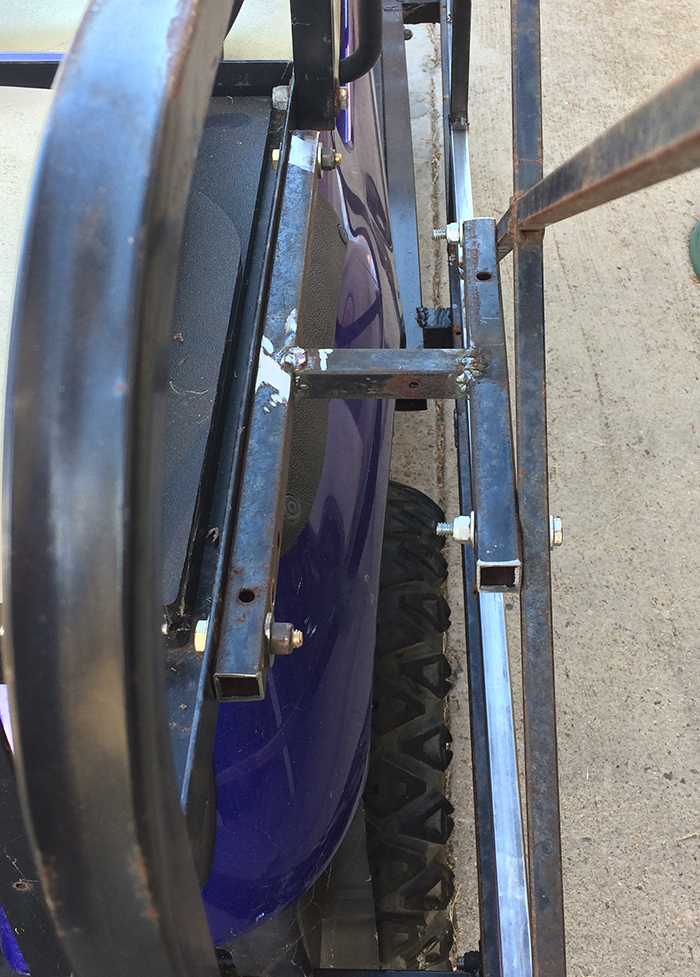
Now having removed the cowling I'm able to weld up some proper seat supports. Currently it attaches to the subframe at four points, and tomorrow
I'll also add a supoort that attaches to a high part of the golf cart frame where the windshield support pins would ordinarily go. This
is a weird metric thread pitch and size, so I guess I'll be off to Marshalls Industrial Hardware soon to get some appropropriate bolts.
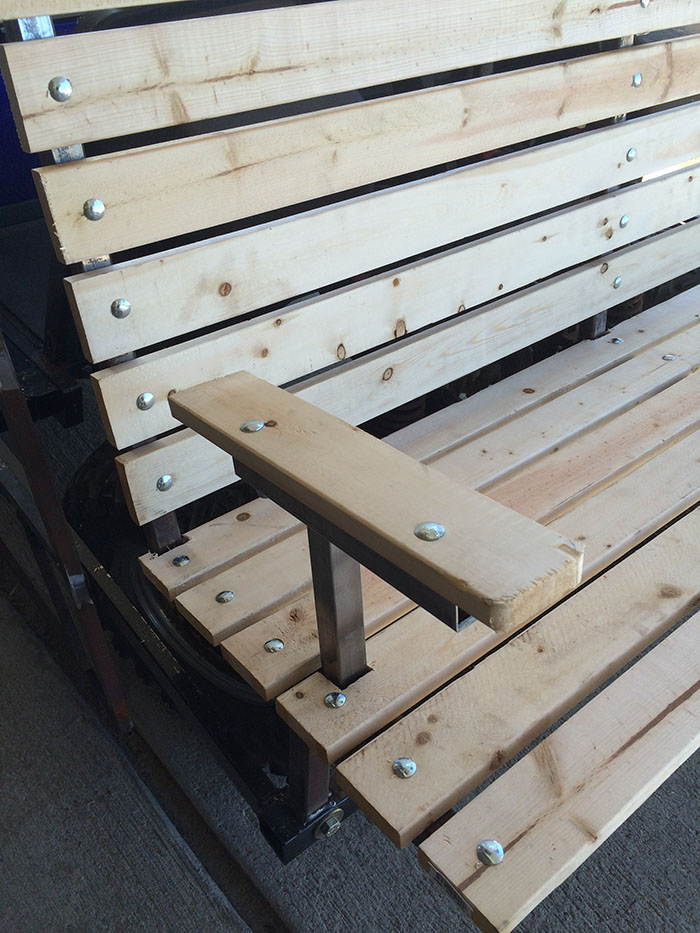
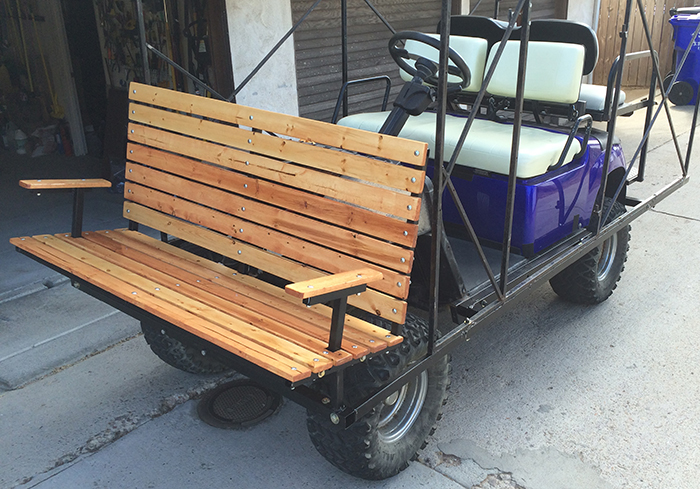
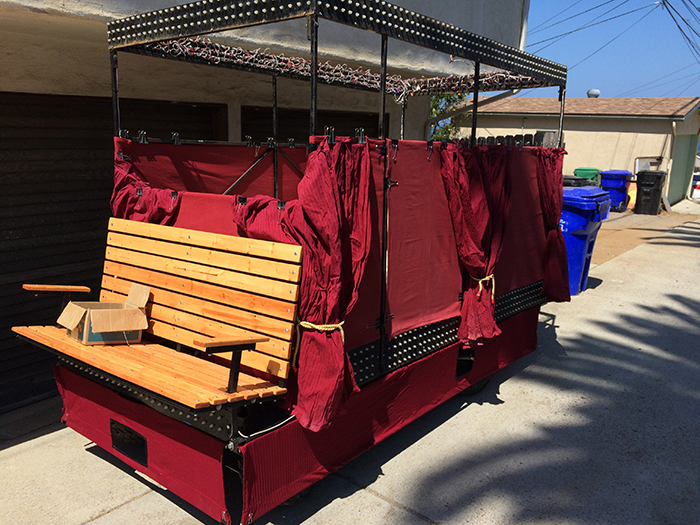
Also, I flashed on the thought that I should make the bench out of a bunch of narrow planks, like an old fashioned park bench. So it'll probably be made of 1" slats or something along those lines. That'd look pretty nice.
As an aside, I'm starting to freak out about time. I'm leaving for the playa in about seven weeks, but I have a friend coming into town for a week and I don't expect to get much done during his visit. I guess I'll know more when I start diddling with the side panels and I figure out if I can reuse those or if I have to start over from scratch. Oy.
All of the bench supports are just tack welded in place at the moment. In the morning I'll check my work before welding them up in earnest.
June 29, 2016: side panels
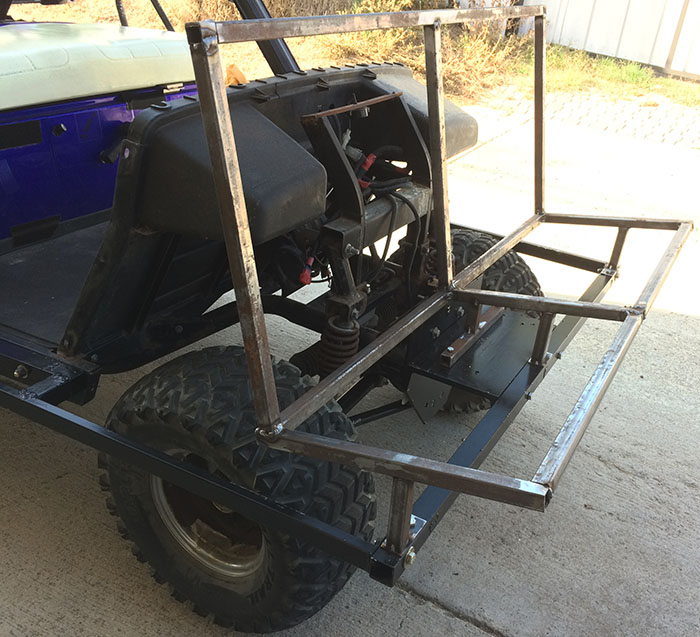
Up until today, everything I've done has been with material I wasn't using previously, either the 1.5" x 1.5" siderails I bought out of the surplus bin, or the bench which was made from scrap metal I'd had sitting around. Today's omelette required breaking my first eggs. First, I welded some attachment points to the side panels. This will raise the sides up about an inch. Once that was done it was time to lop off about a foot and a half from their length. Originally the front of the Fortune Teller's Tent was at the front of the subframe, ahead of the front wheels. Now the tent will end pretty much above the front wheels, and just behind the new bench seat. This meant cutting off the forward-most 15" of the existing side frame panels. There's no turning back now.
So, I started with the passenger side, and it didn't actually take very long and I'm happy with the result.
But the big thing I flashed upon today is that I might be able to get by with keeping the LEDs down low on the skirt panels. The issue I had
with these previously is that they caused the golf cart to bottom out when going up any sort of incline, whether it's a moderately steep driveway,
or the cargo trailer I rent every year. So in this year's proposal I moved those up above the beltline of the subframe, which looks dorky but allows
me to use cloth skirts instead of metal ones. But today I realized that now that the side skirts will not extend beyond the front wheels, it might
make it up the trailer ramp.
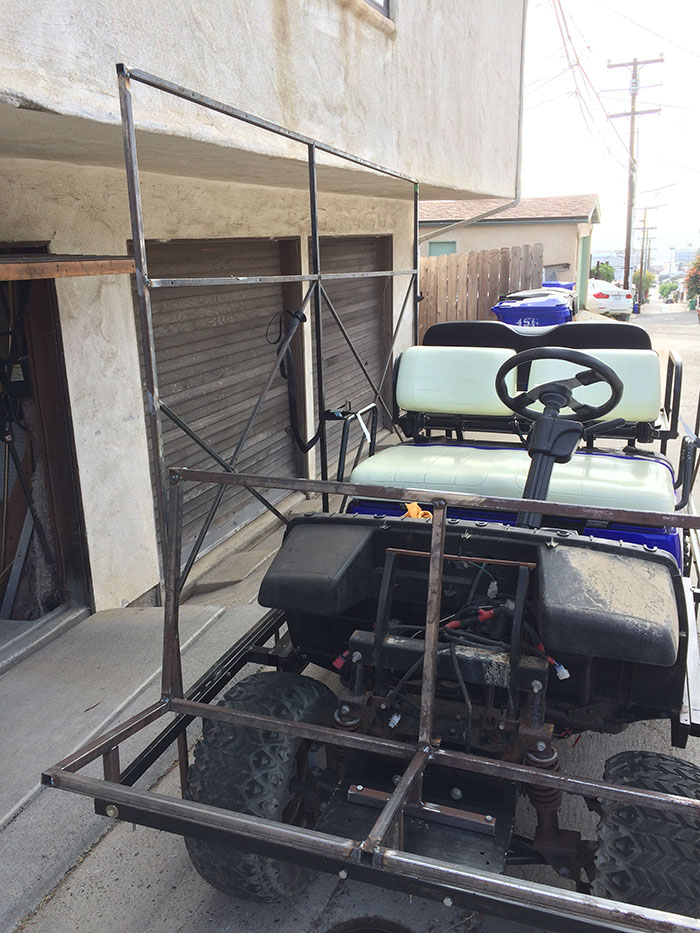
I had originally planned to chop of the side skirts today, but I'm going to hold off on that. My next task is to reduce the length of the driver's side panel, also by 15" to match the passenger side. And I guess I still need to complete the welds on the bench that are only tack welds. After I do all that, I'll arrange to borrow the utility trailer for an hour or two and see if the golf car will drive up it now. This could be a very nice development.
So now, the next question would be - if I decide to keep the LEDs down low where they used to be, do I reuse the individual LED pixels? The issue with the pixels is that they protrude quite some ways behind their sheet metal panels, and it's just a festival of wiring back there. The wheels are much closer to all this wiring than they used to be, and I might end up taking out a bunch of pixels on a steep turn. The alternative would be to save the LED pixels for some other project, and get a bunch of LED strips and some new sheet metal panels, and redo all the lighting on the cart. Right now I am liking that idea, and I emailed my man in Shenzhen to see what he has available.
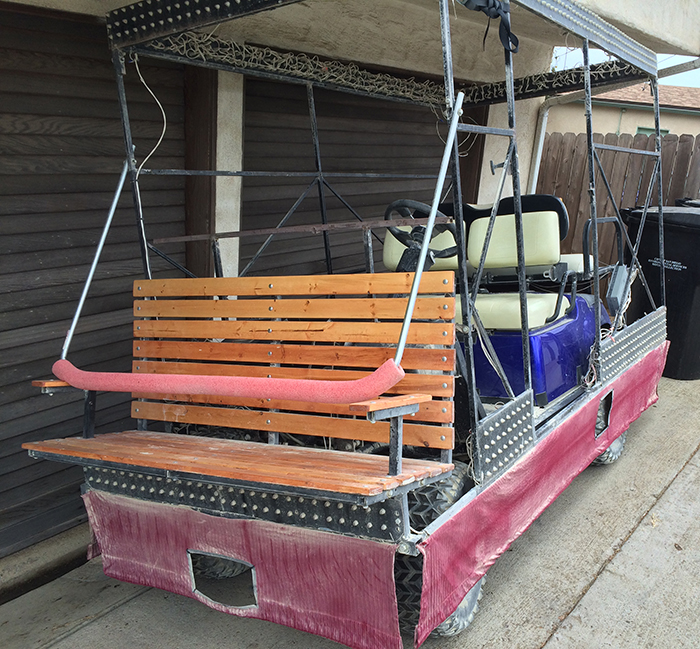
July 2, 2016: bench is done (mostly)
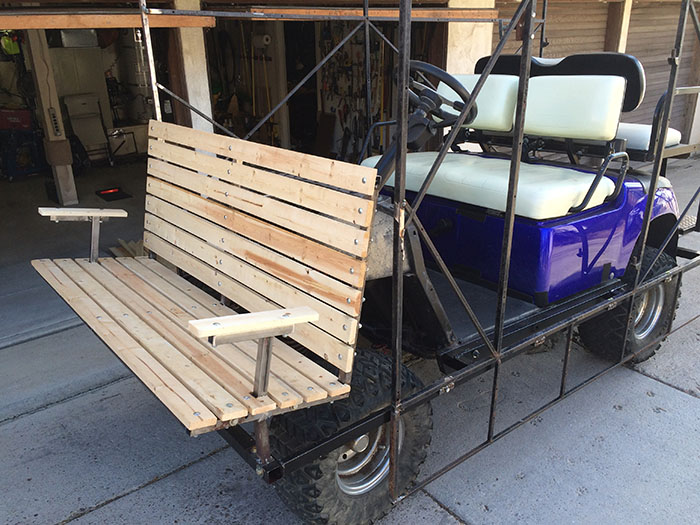
Got all the woodwork cut for the bench, and welded uo arm rests and a rear support piece. Bench is super stable! I just need to take all the wood
off, sand and verathane, and then sand and paint the frame.
July 4, 2016: A stain on Independence Day
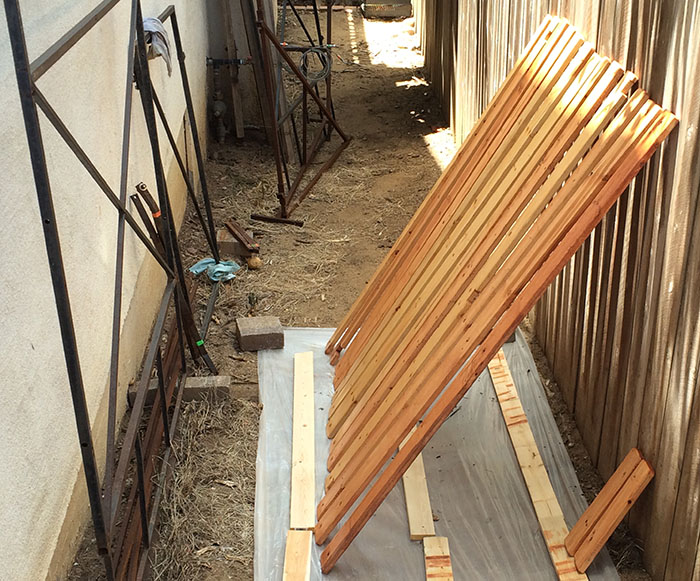
Not really. But I did finish painting the bench frame, and sanded down the slats and put down the first coat of Verathane. On the left you can see
a couple doors and other pieces from previous incarnations of the Mutant Vehicle. I haven't needed to buy very much metal at all this time around.
When I need some tubular steel I chop these pieces up, grind 'em down, and weld up whetever I need.
July 6, 2016: Well, bummer (maybe).
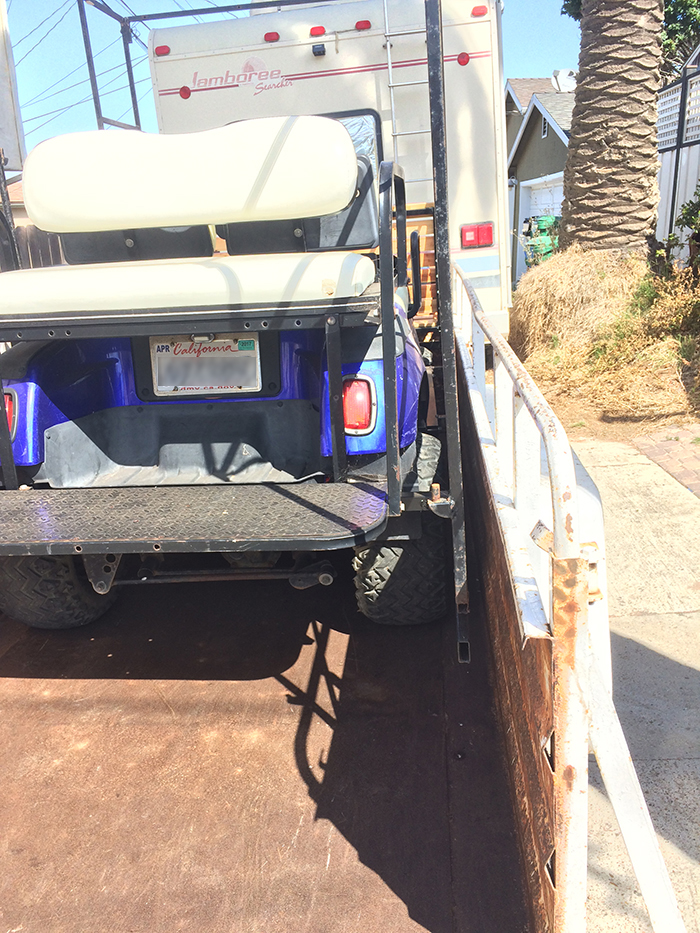
Over the past few weeks I thought I might be able to keep the lights down low, acting as skirts to hide the wheels. So I got ot the point where the frame was complete enough that I was able to bring the trailer up from the rental shop and see if the MV fits. And it didn't. The skirts bottomed out on the rear corners, so I grabbed the angle grinder and cut those off, but I was still only able to get the MV halfway into the trailer before it got stuck. It's just a hair too wide.
So I returned the trailer, and today I cut the skirts off the bottom of the side pieces, and ground those down. And now the side pieces attach to the top of the subframe instead of on the sides. This should save me at least 1.5" in width and eliminate the ground clearance problem. The camper, meanwhile, is in the shop and its the only tow vehicle I have. When I get that back (hopefully soon) I'll grab the trailer again and have another go at it. If it still doesn't fit, I'm pretty much fucked. I guess I'd have to look around for a bigger trailer. Hope it doesn't come to that.
On the plus side, now that the lights are nowhere near the wheels, I don't have to worry about the wheels rubbing the wiring behind the pixels so there's not reason to switch to LED strips. I can reuse all the old pixels with their behind-the-bulb wiring. And the MV will look much closer to the drawing that was approved by DMV.
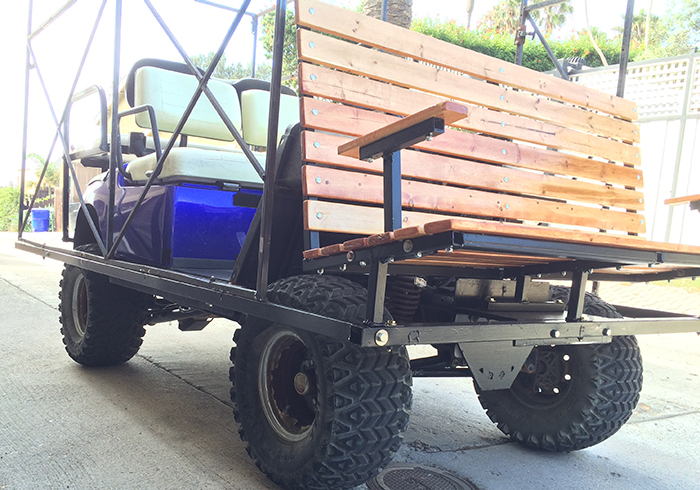
Also, while all that was happening, I was appying coat after coat of spar urethane, and the bench slats look great, so I put the bench back together.
I guess even if everything else goes to shit at least the bench came out awesome!
July 12, 2016: Halle-freaking-lujah!
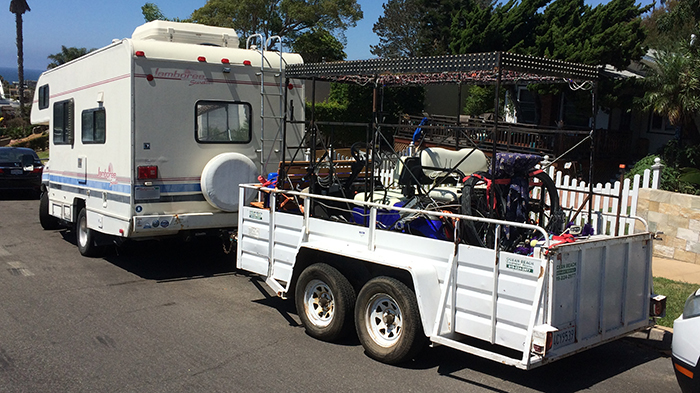
Ok, so today was a pretty good day. The RV was in the shop all last week, and I was reluctant to do much work until I could verify the MV fits in the
trailer, and the RV is my only tow vehicle. So I got the RV back yesterday, and today I went and borrowed the trailer and the MV fits. Just barely,
but it fits.

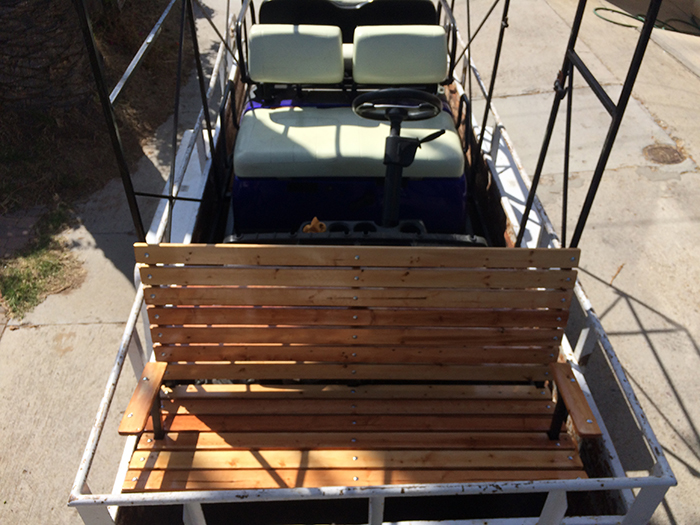
So, having established that, it was time to modify the side panels, and I got both of those done today. I've been reusing a lot of scrap metal for this
project which has been great. I haven't actually spent that much money, apart from whatever electricity costs to run the chop saw, the grinder, and the
MIG welder, hahahaha. Anyway, for this next phase I really needed long, straight pieces of clean metal so I made a run up to Industrial Metal Supply and
spent about 18 bucks on two 10-foot lengths of 3/4" 16ga tubing. I then created a new space about 7.5" high just above the floorboards where the LED pixels
are going to be relocated. Got both sides done today, and I also made some side supports to attach the side pieces to the golf cart chassis. This
greatly reduces the amount of body jiggle.
Next up: I need to do the same for the driver's door, and then I need to modify the rear door now that the cart is narrower, and I never liked how I did the thing in the center that holds up the sign and the tent top, so I'ma weld up a new one tomorrow.
July 14, 2016: More metal cutting
So now that the frame is squared away it's time to modify the pixel panels to fit the new dimensions. Took a good chunk of the day to take measuresments,
cut the metal, and test-mount everything to check for clearances. There were a couple mishaps and regretted decisions along the way, but isn't there
always? Here's what wound up on the cutting room floor.
![]()
July 15-16, 2016: Smoke test
Next it was time to pull out the jumble of pixels and sort everything out. These pixels have a three-wire interface - power, ground, and self-clocking data.
In theory you could just keep stringing them like Christmas lights, but in practice, the resistive losses in the power and ground wires just won't handle
the current load of having many pixels lit at once. So every 50 pixels or so, I tap in fresh power and ground carried on 14- and 16- gauge wiring. It makes
for many bright and shiny pixels but it makes wiring very cumbersome. 80% of my time was spent sorting out power and ground and getting it distribted
nicely. Oh and two of the pixels were dead and needed to be replaced. Once the pixels were mounted I bench tested the segments individually to make sure
everything was working.
![]()
![]()
Once that was done I could mount all the panels in place. Hard to see from this angle but there's even three rows of pixels under the front bench seat.
![]()
A friend came in to town for a week, so it's time to take a little vay-cay from the art car.
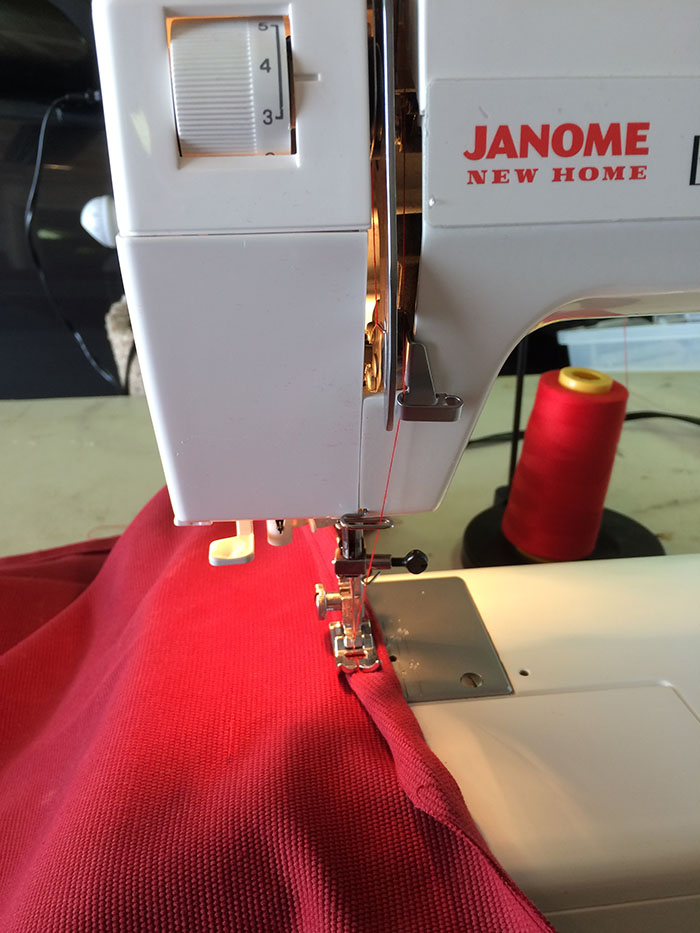
July 26-27, 2016: Ninety-nine problems but a stitch ain't one
Ok, after a great weekend away and some Dead and Phish shows, it was time to get back it. Next step is to do some alterations on the side fabric to
accommodate the slimmed-down chassis.
Also, there's a brand new ceiling panel and I'm very happy with how it came out. Previously I had been using steel
cables as guy wires and had triangular pieces that had to be zip-tied in place. I hated everything about it. It was a pain in the ass to set up, and
another pain to tear down, and it looked like shit. The new roof panel is one solid piece held in place with the same document binders used everywhere
else. It's a much cleaner design and looks a million times better. It's also much easier to put up and take down.
I also made the executive decision to lower the front panel considerably. It's a safety thing. I need the visibility.
The inner panels are done, and not shown are the new wheel skirts. Those actually took much longer than expected. I was trying to use salvaged material from the old roof, and join pieces together to make one longer piece and went down this road for about 3-4 hours before deciding to pull the rip cord and do something else instead. I switched to the same material used for the pleated valence pieces. The material is stretchy and comes with its own set of challanges, but I had enough of it that each of the wheel skirts is one single panel. Saved a lot of headaches.
Also, I've been writing code for some new lighting sequences and in the process discovered a rather nasty bug in the Arduino IDE. Oh, and I dug the aircraft strobe I used as a camp beacon at Juplaya, and I'll be adding that to the cart as well.
August 6, 2016: Lots of progress on multiple fronts
As it gets closer and closer to Go Time, I've been spending less time keeping the blog current, so here's a catch-all to bring things up to date.
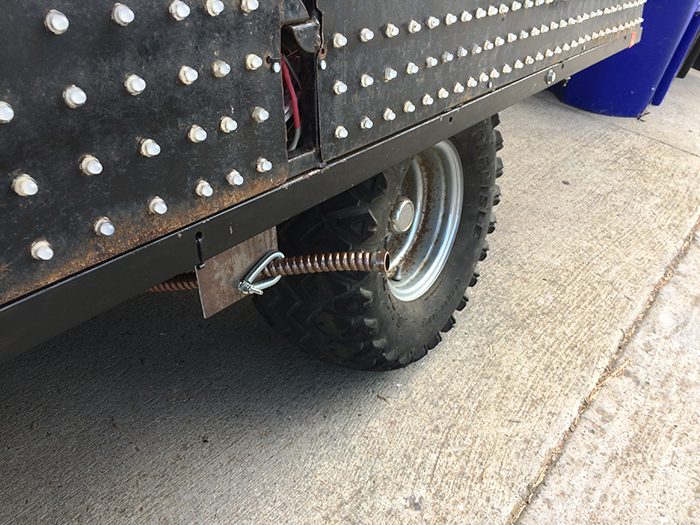
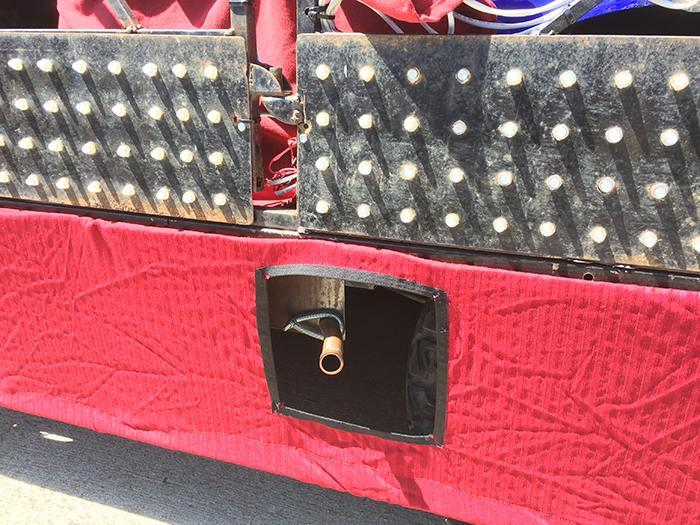
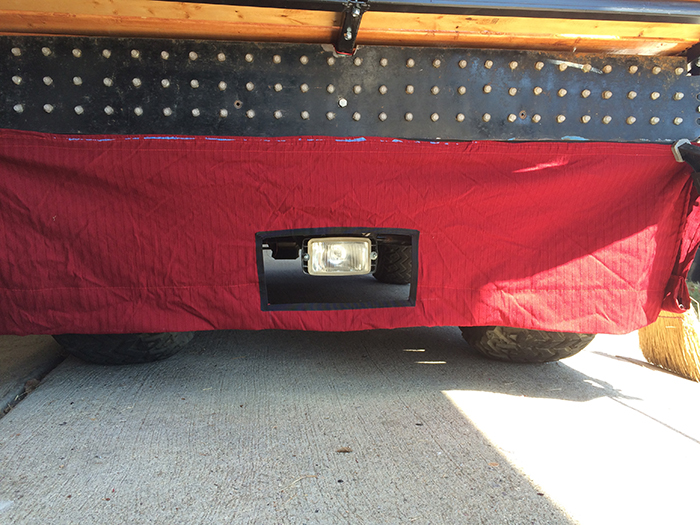
The pixels all work, and the remapping of physical location is done. Wrote some new patterns and continue to do so. The fabric is mostly done and the
wheel skirts came out OK. Had to anchor the exhaust pipe and make an apertures in the side skirt for it and the headlight. Am also adding a really
obnoxious aircraft strobe light, which will be controlled by the same Arduino that controls all the lights.
![]()
August 17, 2016: aaaaaand done.
Suffice it to say lots of little tasks got done that I didn't bother documenting, and now it's time to go. But rest assured that everything is perfect in every way.
It does it into the trailer - just baaarely. Funny how quickly what was supposed to have been three inches of margin will evaporate.
Anyway, it does fit. Doubtful this will get updated until I get back, but I'll try to remmeber to take more on-playa photos this time.
And that's a wrap.
So, like I do every year, I packed a DSLR and tripod with every intention of taking more pictures at Burning Man. And like I do every year, I'm end up having too much fun, or being in the moment, or whatever, but I never once busted out the SLR. So I have no night-time shots, and I only have a couple daytime shots from when I happened to have my phone on me.
Anyway, so the MV was a tight squeeze in the trailer. I knew that already. There was less than an inch of clearance on either side, but of course the MV is also like 10 feet long, so it's not really possible to have the thing precisely aligned in the trailer. Anyway, whatever. Got it in there, enjoyed the drive up over two days, all was uneventful. I arrived the day of the Early Burn, which is a week before DMV opens and two weeks before the Man Burn. So I had a full week to perform perhaps 4 hours of assembly work. That was just about my speed.
Only real surprise was that as the MV bounced its way to Black Rock City, it rubbed against the gunwhale (angled lip) of the trailer
and broke about ten pixels. I had a soldering iron with me, so that took another hour or so to fix.
![]()
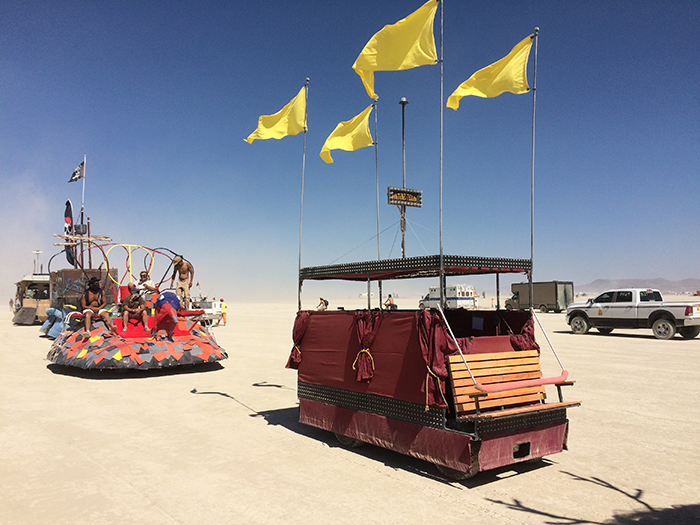
DMV inspection went smoothly. For daytime, I was in line about 2h and there were no issues. In fact, at the end the DMV Hottie asked
me what the base vehicle was, so that was great. They love it when the base vehicle is not obvious. I only have a handful of photos
that show the MV fully assembled. The thing at the top of the center mast is the aircraft strobe.
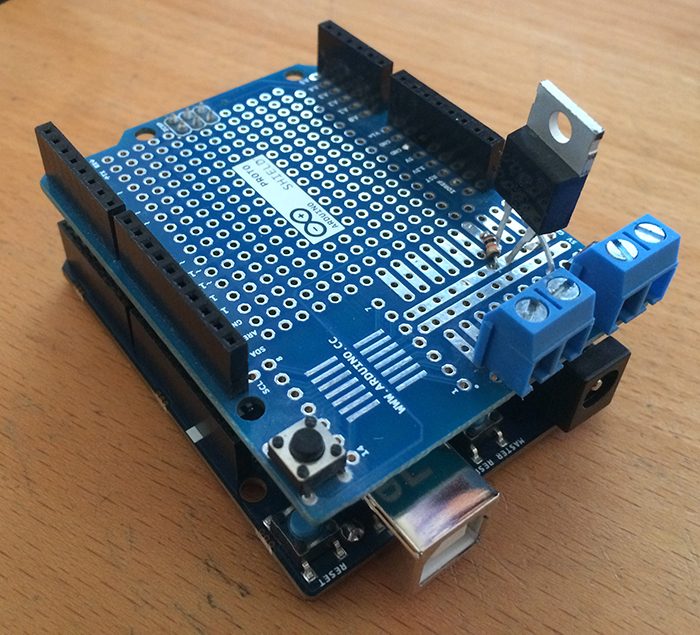
Something weird happened with the strobe control cicruit. I had added a MOSFET to an Arduino shield so I could turn the strobe light on and off in software. The idea was to keep the strobe off most of the time, and only enable it during the most obnoxious lighting patterns. But one evening pre-event I carelessly connected something to the battery backwards and I must have popped something but I never did figure out what. But the strobe light, when plugged in, flashed and remained flashing full time, not just when told do. I had a spare Arduino and a spare sheild, and swapping those out didn't remedy the issue, and even weirded, the boards both bench-tested correctly when using a 12 bulb as a test load. So that's a mystery I'd like to resolve at some point.
The only other mishap(s) involved two of the banner masts. One of the masts broke during a windstorm, and the other mast was taken
out by a passing staff vehicle from First Camp. I never did figured out whose it was, but they spent the week speeding down
our service road, and one of the banner masts on their vehicle struck mine and theirs won the joust. My two failures occurred
at the upper bolt hole where the mast bolts onto the MV frame. I guess the bolt I used were too big and the resulting holes took too
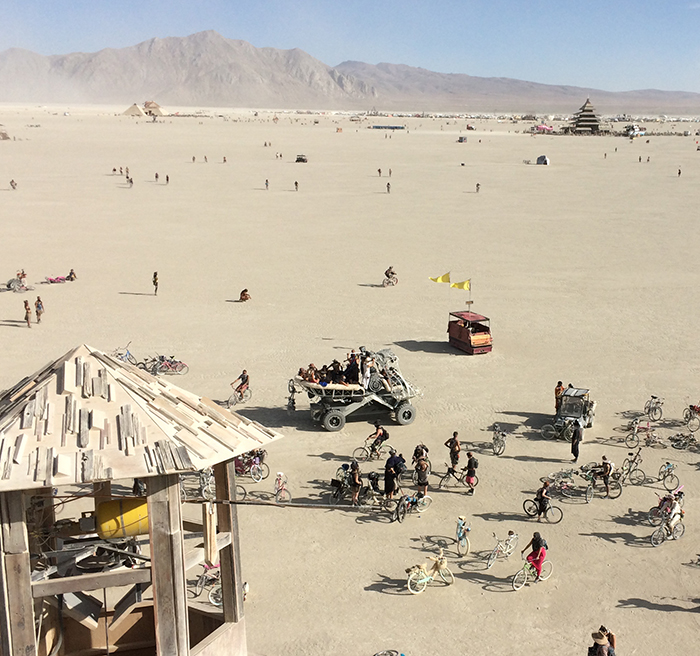
much metal away from the mast. So here it is, down two masts, parked near the lighthouse.
Interestingly enough, I did not suffer any broken pixels on the drive home. I don't know if I had the cart centered better, or cinched down
better, but the drive home, also uneventful, was also damage-free.